
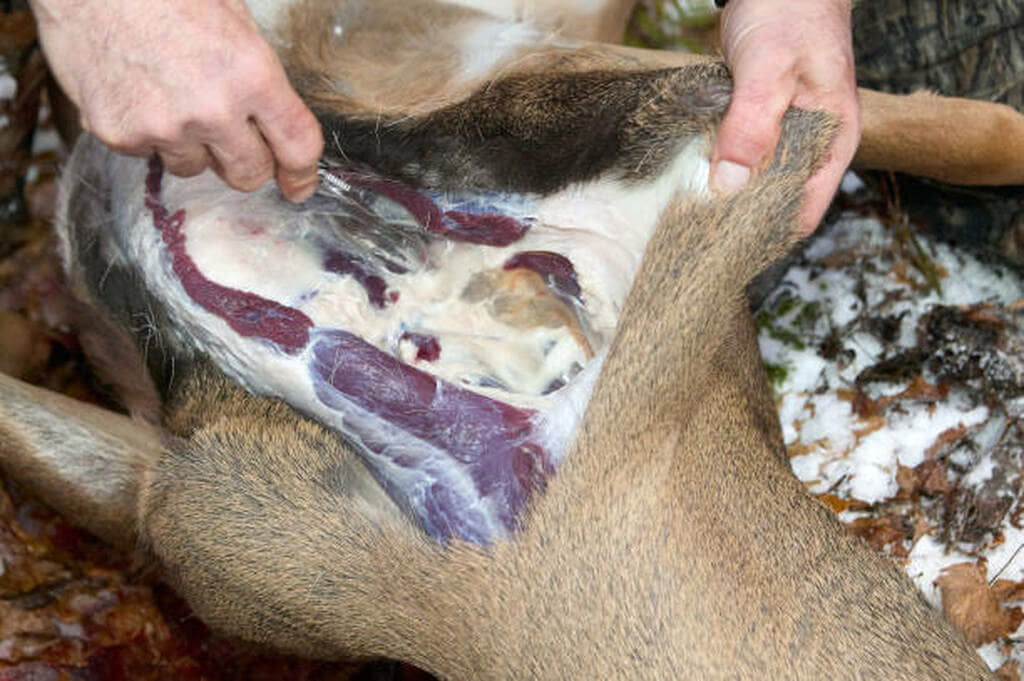
Deboning a deer is the process of separating venison from the bones while preserving as much usable meat as possible. A proper deboning technique reduces waste, speeds up meat processing, and makes it easier to package cuts for steaks, roasts, ground venison, or long-term freezer storage. Whether you harvested a whitetail, mule deer, or another deer species, the basic process remains the same once the animal has been field dressed and skinned.
Many hunters assume deboning is difficult because of the number of muscle groups and bones. In reality, deer muscles are connected by natural seams that allow the meat to separate cleanly with a sharp boning knife instead of cutting through bone. Following these seams helps preserve premium cuts such as the backstraps and tenderloins while maximizing the amount of venison recovered from the shoulders, hind quarters, neck, and ribs.
This guide explains how to debone a deer step by step using the same sequence many experienced hunters and home meat processors follow. You’ll learn which tools you need, how to prepare the carcass, how to remove each major cut efficiently, how to trim silver skin, avoid common mistakes that waste meat, and how to store venison safely after processing. By the end of this guide, you’ll be able to turn a harvested deer into clean, organized cuts that are ready for cooking or freezing.
What tools do you need to debone a deer?
You only need a few basic tools to debone a deer efficiently, but using the right equipment makes the process faster, safer, and reduces meat loss. A sharp knife does far more work than force, allowing you to separate muscles along their natural seams instead of cutting through them.
The most important tool is a boning knife with a narrow, flexible blade between 5 and 6 inches long. Its shape allows you to work around joints, follow bones closely, and remove meat without leaving large portions attached to the skeleton. Many hunters also keep a larger butcher knife nearby for trimming larger cuts and a small fillet knife for detailed work around the backstraps and neck.
Beyond knives, prepare a stable cutting table, several clean food-grade containers or trays, disposable gloves, paper towels, and sharpening equipment. A knife that loses its edge forces you to use more pressure, increasing the risk of slipping and cutting away usable meat. Touching up the blade several times during processing is more effective than waiting until it becomes completely dull.
If you plan to package meat immediately, have vacuum-seal bags, freezer paper, labels, and a marker ready before you begin. Organizing the workspace first prevents unnecessary handling and helps keep different cuts separated for easier packaging later.
How should you prepare a deer before deboning?
A deer should be field dressed, skinned, and cooled before deboning begins. Removing the hide and lowering the meat temperature slows bacterial growth, improves meat quality, and makes muscles easier to separate.
If possible, hang the deer by the hind legs. Suspending the carcass keeps it stable, exposes each muscle group, and allows gravity to help while removing shoulders, hind quarters, and backstraps. When hanging isn’t possible, place each quarter on a clean cutting table and debone one section at a time.
Keep the work area as clean as possible throughout the process. Dirt, leaves, hair, and bone fragments can contaminate venison and increase trimming later. Wipe knives frequently, change gloves when they become excessively dirty, and separate finished cuts from pieces that still require trimming.
Temperature also plays an important role. Slightly chilled venison is easier to cut than warm meat because the muscles remain firm and hold their shape. If outdoor temperatures are high, place quarters in a cooler with proper airflow or refrigerate them until the surface cools before beginning to debone. Avoid leaving meat at room temperature longer than necessary, especially during early-season hunts.
Preparing the deer properly takes only a short time, but it makes every step that follows cleaner, faster, and more efficient while helping preserve the flavor and texture of the finished venison.
How do you debone a deer step by step?
Deboning a deer is easiest when you work one major cut at a time and follow the natural muscle seams instead of cutting through muscle or bone. This approach preserves more venison, produces cleaner cuts, and simplifies trimming later.
Remove the front shoulders
Start with the front shoulders because they are attached by muscle rather than bone. Pull one front leg away from the body and locate the seam where the shoulder meets the rib cage. Slide the tip of your boning knife through this seam while lifting the leg. Continue making short, controlled cuts until the shoulder separates completely.
Once the shoulder is removed, place it on the cutting table. Follow the shoulder blade with the knife, peeling meat away from the bone instead of slicing through large muscle groups. Separate larger muscles into roasts or steaks, and trim the remaining meat for stew or ground venison. The front shoulders contain a significant amount of usable meat, so taking your time here can noticeably improve overall yield.
Debone the hind quarters
The hind quarters provide the largest and most valuable cuts of venison. Lay one quarter with the inside facing upward and locate the natural seams that divide the major muscle groups. Use the tip of the knife to open these seams, allowing the muscles to separate naturally.
Work around the femur by keeping the blade against the bone at all times. This technique removes nearly all usable meat while minimizing waste. As each muscle is freed, separate it into individual cuts rather than leaving the entire quarter intact. Larger muscles are well suited for steaks or roasts, while smaller sections can be reserved for stew meat or grinding.
Avoid cutting across muscle fibers unless you are portioning the meat. Keeping muscles whole improves both appearance and tenderness when the venison is prepared later.
Remove the backstraps
The backstraps are among the most tender cuts on a deer and should be removed carefully. Begin at the neck end of the spine and make a shallow cut along one side of the backbone. Extend the cut toward the hips while keeping the blade against the vertebrae.
Next, make a second cut along the top of the ribs. Gently lift the backstrap with one hand while using the knife to release the connective tissue underneath. The muscle should separate in one long piece with very little resistance if the blade follows the bone closely.
Repeat the same process on the opposite side. Avoid cutting deeply into the backstrap, as unnecessary slices reduce the quality of steaks cut from this premium section.
Remove the tenderloins
The tenderloins are located inside the body cavity beneath the backbone, just forward of the pelvis. Because these muscles are small and lightly worked, they are considered the most tender cut on the animal.
Carefully slide the knife beneath each tenderloin and free it by cutting only the thin connective tissue holding it in place. Excessive trimming is unnecessary, as very little fat or silver skin covers this cut. Since the tenderloins dry out quickly, place them in a clean container immediately after removal.
Trim the neck, rib, and flank meat
After the premium cuts have been removed, recover the remaining venison from the neck, ribs, brisket, and flank. Although these areas do not produce large steaks, they contain enough meat for burger, sausage, jerky, or slow-cooked recipes.
Work systematically from one end of each section to the other, keeping the blade against the bone to recover as much meat as possible. Short, precise strokes are more effective than long slicing motions because they reduce waste and help prevent accidental cuts into connective tissue or bone.
Before moving to trimming, inspect every major bone—including the shoulder blade, femur, pelvis, ribs, and neck vertebrae—to ensure no significant pieces of meat remain attached. A careful final inspection often recovers additional venison that would otherwise be discarded.
How do you trim and separate venison cuts?
Trimming venison removes connective tissue and prepares each cut for its best cooking method. Once all meat has been separated from the bones, organize it into premium cuts, roasting cuts, stew meat, and ground venison before packaging.
The first step is removing silver skin, the thin, silvery membrane that covers many muscles. Unlike fat, silver skin does not break down during cooking. Instead, it shrinks as it heats, causing steaks to curl and become chewy. Slip the tip of your boning knife just beneath the membrane, angle the blade slightly upward, and pull the silver skin tight with your free hand while making long, shallow cuts. This technique removes the membrane without sacrificing unnecessary meat.
Unlike beef, deer fat is usually removed during processing. Venison fat oxidizes more quickly than beef fat and can develop a waxy texture or gamey flavor during storage. Trim away thick exterior fat, bruised tissue, dried edges, bloodshot meat, and damaged areas caused by the bullet or broadhead. Keeping only clean, healthy muscle improves both flavor and freezer life.
Once trimming is complete, separate the meat by its intended use. Reserve the backstraps and larger hind-quarter muscles for steaks, as these cuts are naturally tender. Muscles from the top and bottom round, sirloin, and rump can also be left whole for roasts. Neck meat, flank meat, rib trimmings, and smaller shoulder pieces are excellent choices for stew meat, jerky, sausage, or ground venison.
Sorting each cut before packaging also makes future meal preparation much easier. Instead of thawing an entire quarter, you’ll have individually packaged cuts that match specific recipes, reducing waste and saving time in the kitchen.
Read more: How to Bleach a Deer Skull: The Steps You Need to Follow
What mistakes should you avoid when deboning a deer?
Most meat loss occurs because of poor technique rather than the anatomy of the deer. Avoiding a few common mistakes will improve meat yield, reduce trimming time, and produce cleaner cuts.
One of the biggest mistakes is using a dull knife. A dull blade tears muscle fibers instead of slicing cleanly, forcing you to apply more pressure and increasing the chance of slipping. It also leaves more meat attached to the bones. Honing the knife regularly throughout the job keeps cuts clean and controlled.
Another common error is cutting across muscle groups instead of following natural seams. Every major muscle is separated by thin layers of connective tissue. Opening these seams allows muscles to come apart with minimal effort while preserving their shape. Cutting directly through the middle of muscles creates uneven pieces that are harder to cook and less visually appealing.
Many beginners also leave valuable meat on the carcass. The neck, ribs, brisket, flank, and areas around the pelvis often contain several pounds of usable venison. Taking a few extra minutes to inspect each bone before disposal can significantly increase the total amount of meat recovered from the animal.
Improper handling after deboning can reduce meat quality just as quickly as poor knife work. Leaving venison exposed to dirt, hair, direct sunlight, or warm temperatures encourages bacterial growth and increases spoilage. Keep finished cuts in clean containers, minimize handling, and return the meat to refrigeration or a cooler as soon as possible.
Finally, avoid rushing the process. Deboning is not a race. Slow, deliberate cuts along the bone recover more meat, protect premium cuts such as the backstraps and tenderloins, and produce packages that require far less trimming before cooking.
How should you store venison after deboning?
Proper storage preserves the flavor, texture, and safety of venison long after the deer has been processed. Once each cut has been trimmed, package it as quickly as possible to minimize exposure to air and bacteria.
If you plan to cook the meat within a few days, refrigerate it at 34–38°F (1–3°C). Keeping venison just above freezing slows bacterial growth while allowing the meat to remain fresh. Many hunters also age venison under these conditions for 2 to 7 days to improve tenderness. Aging should only be done if the meat has been cooled properly and maintained at a consistent temperature.
For long-term storage, vacuum sealing is the best option. Removing air helps prevent freezer burn, reduces moisture loss, and extends the storage life of venison. If a vacuum sealer is unavailable, wrap each cut tightly in plastic wrap before covering it with freezer paper or placing it in a heavy-duty freezer bag. Eliminate as much trapped air as possible before sealing.
Label every package with the cut name and processing date. This simple habit makes it easier to rotate older packages first and quickly find the right cut when preparing meals.
When stored at 0°F (-18°C) or below, vacuum-sealed venison generally maintains its best quality for 9 to 12 months, although it remains safe beyond that if continuously frozen. Ground venison is best used within 3 to 6 months, while steaks and roasts retain their quality longer because they have less exposed surface area.
Frequently asked questions about deboning a deer
Can you debone a deer without a bone saw?
Yes. A bone saw is usually unnecessary because most major cuts can be removed by following muscle seams and joints with a sharp boning knife. Many experienced hunters process an entire deer without cutting through a single large bone.
Is it better to debone a deer in the field?
It depends on your hunting situation. Backcountry hunters often debone a deer before packing it out to reduce weight and eliminate unnecessary bones. Hunters with easy vehicle access may prefer transporting the carcass or quarters home before processing, where they have better lighting, stable work surfaces, and refrigeration.
How long does it take to debone a deer?
An experienced hunter can debone an average deer in 45 to 90 minutes, depending on the size of the animal and the desired level of trimming. Beginners commonly need 1.5 to 3 hours, especially if they are learning muscle anatomy or separating individual cuts for the first time.
How much meat can you expect from an average deer?
A healthy deer typically yields 35% to 45% of its live weight as boneless venison, although the exact amount varies with species, age, body condition, and shot placement. Careful deboning and thorough trimming around the neck, ribs, and pelvis can noticeably increase the final amount of usable meat.
Is it better to debone a deer before freezing?
Yes. Deboning before freezing saves freezer space, allows each cut to freeze more evenly, and makes meal preparation easier. Separating steaks, roasts, stew meat, and ground venison before packaging also reduces waste because you only thaw the amount needed for each meal.