
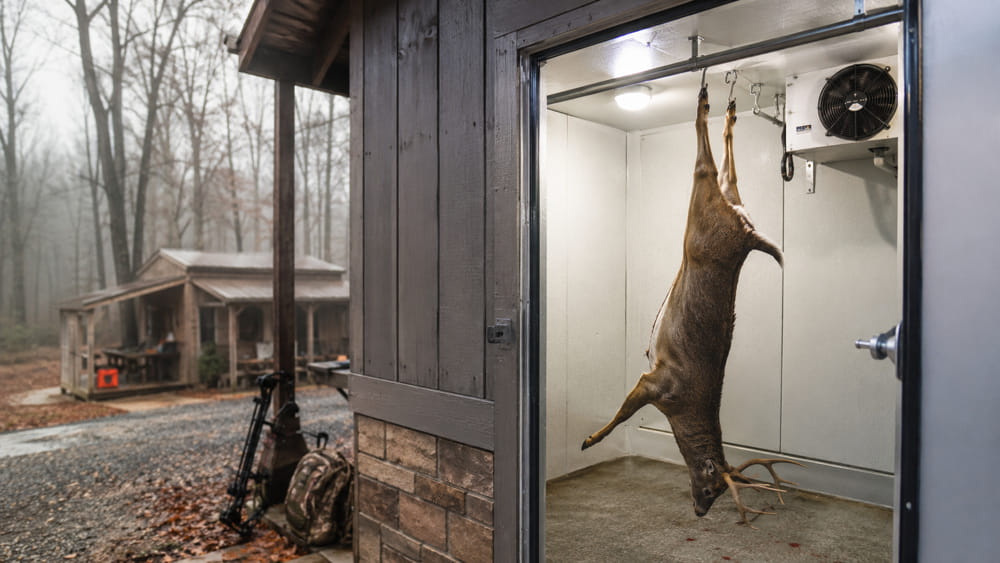
A walk-in cooler for deer allows hunters to control the temperature, protect meat quality, and properly store harvested deer before processing. After a successful hunt, keeping a deer carcass at the correct temperature is one of the most important steps to prevent spoilage, reduce bacterial growth, and maintain the quality of venison.
Building a deer walk-in cooler requires more than installing a refrigeration unit in an enclosed space. The design must consider cooler size, insulation materials, airflow, cooling capacity, temperature control, and sanitation requirements. A properly built system creates a stable environment where hunters can hang deer carcasses safely and prepare meat when conditions are optimal.
This guide explains how to build a walk-in cooler for deer from the ground up. It covers the required materials, refrigeration components, sizing considerations, construction process, operating temperature, maintenance practices, and common mistakes hunters should avoid. Whether the goal is creating a dedicated hunting camp cooler or converting an existing garage or shed, the right setup helps preserve harvested game meat efficiently.
Why Do Hunters Need a Walk-In Cooler for Deer Processing?
A walk-in cooler for deer processing gives hunters a controlled environment to store harvested deer before butchering. The main purpose of a deer cooler is to maintain a stable cold temperature that slows bacterial growth and protects venison quality after harvest. Unlike temporary storage methods such as hanging deer outdoors, a dedicated cooler allows hunters to control conditions that directly affect meat safety, texture, and aging quality.
After a deer is harvested, the carcass temperature begins to change based on outdoor conditions, weather, and processing time. A walk-in cooler reduces this variation by creating a consistent environment with controlled temperature, airflow, and humidity. This process helps prevent rapid bacterial multiplication, especially during warmer hunting seasons when outside temperatures are not suitable for safe meat storage.
A properly designed deer cooler also improves the meat aging process. Hanging venison under controlled conditions allows natural enzymes to break down muscle fibers, which can improve tenderness and flavor. Hunters who process multiple deer during hunting season benefit from having a dedicated space where carcasses can remain protected until they are ready for cutting and packaging.
Building a walk-in cooler is especially useful for hunters who frequently harvest deer, operate hunting camps, or process game meat for extended periods. A reliable cooling system reduces dependence on unpredictable outdoor temperatures and creates a safer workflow from harvest to final meat storage.
What Size Walk-In Cooler Do You Need for Deer?
The size of a deer walk-in cooler depends on the number of deer you plan to store, the available hanging space, and the amount of room required for proper air circulation. A properly sized deer cooler must provide enough space to hang carcasses without crowding while allowing cold air to move evenly around the meat. A cooler that is too small reduces cooling efficiency, while an oversized cooler increases construction and operating costs.
For most hunters, the first measurement to consider is the number of deer the cooler needs to hold at one time. A single deer carcass requires enough vertical clearance for hanging from the hind legs while keeping the meat away from walls and cooling equipment. Hunters who process multiple deer during hunting season need additional width and length to prevent carcasses from touching each other.
A practical deer cooler design should include three types of space: hanging space, airflow space, and working space. Hanging space supports the carcass weight and keeps the deer positioned correctly. Airflow space allows refrigerated air to circulate around all surfaces of the meat. Working space gives hunters room to inspect, clean, or prepare the carcass before processing.
The required cooler size also depends on how the cooler will be used. A hunter who harvests one deer occasionally may only need a compact setup, while a hunting camp processing several deer during the season requires a larger walk-in cooler. Planning for future use is important because expanding a small cooler later can require replacing insulation, refrigeration equipment, or the entire structure.
Before building the cooler, hunters should measure the available location and calculate the maximum number of deer that need to be stored. A well-planned size improves cooling performance, reduces energy waste, and creates a safer environment for deer meat processing.
What Materials Do You Need to Build a Deer Walk-In Cooler?
Building a deer walk-in cooler requires materials that control heat transfer, prevent moisture problems, and maintain a stable cold environment. The essential materials for a deer cooler include insulated walls, ceiling insulation, a sealed door, moisture protection layers, and durable interior surfaces. Each component affects how efficiently the cooler maintains temperature and how long the system operates reliably.
Insulated panels are the foundation of a walk-in cooler because they reduce heat entering the storage area. Most deer coolers use polyurethane panels, spray foam insulation, or other rigid insulation materials with high R-values. Higher insulation performance reduces the workload on the refrigeration system because less heat passes through the cooler walls.
The ceiling and floor require the same attention as the walls. Heat can enter through any unprotected surface, and moisture can create problems inside the cooler. A properly designed floor system should resist water absorption and support regular cleaning after deer processing. Adding a vapor barrier helps prevent condensation from forming inside the insulation layers.
The cooler door is another critical component because frequent opening and closing creates one of the largest sources of temperature loss. A properly sealed insulated door with strong gaskets prevents cold air from escaping and reduces strain on the refrigeration unit. Hunters should avoid using standard exterior doors because they usually lack the insulation performance required for cold storage.
Interior materials should also support food safety and easy maintenance. Smooth, washable surfaces allow hunters to remove blood, moisture, and debris after processing. Stainless steel, coated metal panels, or other food-safe materials are commonly used because they resist corrosion and simplify cleaning.
Selecting the correct materials during construction improves cooling efficiency, reduces operating costs, and extends the lifespan of the deer walk-in cooler. A well-insulated structure allows the refrigeration system to maintain stable temperatures even when outdoor conditions change during hunting season.
How Do You Choose the Right Refrigeration System for a Deer Cooler?
The refrigeration system determines whether a deer walk-in cooler can maintain the temperature required for safe meat storage. The right refrigeration system must match the cooler size, insulation quality, expected deer load, and outdoor temperature conditions. Choosing an undersized unit causes slow cooling and temperature instability, while an oversized system can increase costs without improving performance.
The first factor to consider is the cooling capacity required for the space. Refrigeration capacity is commonly measured in BTUs, which represent the amount of heat the system can remove over time. A larger cooler with poor insulation, frequent door openings, or multiple warm carcasses requires more cooling capacity than a smaller, well-insulated cooler.
The main refrigeration components include the compressor, condenser, evaporator, and temperature controller. The compressor moves refrigerant through the system, the condenser releases heat outside the cooler, and the evaporator removes heat from inside the storage area. The thermostat or temperature controller monitors conditions and activates the system when the temperature rises above the target range.
The evaporator placement is important because it affects airflow throughout the cooler. Cold air must circulate around hanging deer carcasses instead of creating areas with uneven temperatures. Poor airflow design can cause some parts of the cooler to remain warmer, increasing the risk of inconsistent meat preservation.
Hunters should also consider the operating environment when selecting refrigeration equipment. A cooler located in an outdoor hunting camp during warm weather requires a system designed to handle higher ambient temperatures. A unit installed inside a garage or insulated building may have lower cooling demands because the surrounding temperature changes less.
Selecting the correct refrigeration system creates a stable environment for deer processing and reduces long-term operating problems. A properly matched system maintains consistent cooling performance, protects venison quality, and prevents unnecessary energy consumption.
What Temperature Should a Deer Walk-In Cooler Maintain?
The temperature inside a deer walk-in cooler directly affects meat safety, aging quality, and storage time after harvest. A deer cooler should maintain a consistently cold environment that slows bacterial growth while allowing proper meat aging. Temperature fluctuations reduce cooling performance and can create conditions where bacteria multiply faster, especially when warm carcasses are placed inside the cooler.
A harvested deer produces heat from the animal’s body even after death, and the cooling process must remove this heat efficiently. A properly designed cooler lowers the internal temperature of the carcass gradually while maintaining stable conditions around the meat. This process helps protect venison quality by reducing spoilage risks and maintaining desirable texture.
Temperature consistency is more important than short periods of extreme cooling. A refrigeration system that repeatedly cycles between warm and cold conditions creates stress on the equipment and reduces preservation efficiency. Hunters should use a reliable temperature controller or monitoring system to track conditions inside the cooler and identify problems early.
The airflow design also affects temperature performance. Cold air must reach all areas of the hanging carcass, including areas between multiple deer stored in the same space. Poor airflow can create warm zones where meat cools slower than expected, increasing the chance of uneven aging or spoilage.
Humidity control is another factor in deer meat preservation. Excess moisture can encourage surface bacteria growth and create condensation problems, while extremely dry conditions can cause unnecessary moisture loss from the meat. A balanced environment supports better venison quality during the hanging and aging process.
The length of time deer can remain in a cooler depends on several factors, including temperature stability, carcass condition, cleanliness, and airflow. Hunters who maintain proper cooling conditions have better control over the processing timeline and can avoid rushing meat preparation immediately after harvest.
How Do You Build a Walk-In Cooler for Deer Step by Step?
Building a walk-in cooler for deer requires a structured approach that combines insulation, refrigeration, electrical setup, and food-safe design. The basic construction process involves selecting the location, building an insulated enclosure, installing cooling equipment, sealing the structure, and testing temperature performance before storing deer. Each step affects the cooler’s ability to maintain stable conditions during hunting season.
The first step is choosing the correct location for the cooler. The area should have enough space for the planned cooler size, access to electricity, protection from excessive heat, and a surface that can support the structure. Many hunters build deer coolers inside garages, sheds, barns, or dedicated hunting camp buildings because existing structures can reduce construction requirements.
After selecting the location, the next step is constructing the insulated enclosure. The walls, ceiling, and floor must create a sealed environment that prevents heat transfer. Insulated panels should be installed tightly, and all gaps should be sealed to prevent warm air and moisture from entering the cooler. Even small openings can reduce cooling efficiency because the refrigeration system must work harder to maintain temperature.
The refrigeration equipment is installed after the insulated structure is complete. The evaporator should be positioned to distribute cold air throughout the cooler, while the condenser unit should release heat in a location with proper ventilation. Electrical connections, temperature controllers, and safety components should be installed according to equipment specifications.
Once the system is assembled, the cooler should be tested before placing a deer carcass inside. Hunters should check whether the unit reaches and maintains the target temperature, whether cold air circulates evenly, and whether the door seals properly. Testing identifies problems such as air leaks, condensation, or insufficient cooling capacity before the cooler is used for meat storage.
A successful deer walk-in cooler build depends on proper planning and attention to detail. Combining quality insulation, correctly sized refrigeration equipment, and regular testing creates a reliable system for preserving harvested deer throughout the hunting season.
How Much Does It Cost to Build a Walk-In Cooler for Deer?
The cost of building a walk-in cooler for deer depends on the cooler size, construction materials, refrigeration equipment, and whether the hunter builds the system from scratch or modifies an existing structure. A deer walk-in cooler typically requires investment in insulation, cooling equipment, electrical components, and interior materials that support safe meat storage. Understanding each cost factor helps hunters choose a design that matches their budget and processing needs.
The largest cost factor is usually the refrigeration system. The price depends on the cooling capacity required for the cooler size and the expected workload. A small cooler used by a single hunter requires less cooling power than a larger system designed for a hunting camp that processes multiple deer during the season. Choosing the correct capacity prevents unnecessary spending while ensuring reliable cooling performance.
Insulation materials also have a major impact on construction cost and long-term operating expenses. Higher-quality insulated panels usually cost more upfront but reduce heat transfer and allow the refrigeration system to run more efficiently. Poor insulation may lower initial construction costs but creates higher electricity usage and increases the workload on the cooling equipment.
The construction method affects the total budget. Building a cooler inside an existing garage, shed, or insulated building can reduce costs because the surrounding structure already provides protection from outdoor conditions. A completely new standalone cooler requires additional expenses for walls, flooring, roofing, electrical installation, and weather protection.
Hunters should also include ongoing operating costs when planning a deer cooler. Electricity consumption, cleaning supplies, replacement parts, and refrigeration maintenance all contribute to the total ownership cost. A properly designed cooler with efficient insulation and correctly sized equipment usually requires less maintenance and operates more efficiently over time.
The best approach is to balance initial construction costs with long-term performance. Investing in essential components such as insulation, door seals, and reliable refrigeration equipment creates a deer walk-in cooler that performs consistently and protects harvested meat quality.
Read more: How to Make Deer Blind Windows That Open Quietly
How Do You Maintain a Deer Walk-In Cooler?
Maintaining a deer walk-in cooler keeps the refrigeration system efficient and protects harvested meat from contamination. A properly maintained deer cooler requires regular cleaning, temperature monitoring, door inspection, and refrigeration system checks. Without routine maintenance, problems such as temperature fluctuations, excessive moisture, equipment failure, and meat spoilage can develop over time.
Cleaning the cooler after each deer processing session is one of the most important maintenance steps. Blood, tissue particles, and moisture from deer carcasses can create conditions that support bacterial growth if they remain on interior surfaces. Hunters should clean walls, floors, hanging equipment, and processing areas using food-safe cleaning products to maintain a sanitary storage environment.
Temperature monitoring should be performed regularly because cooling problems often appear before complete system failure. A reliable thermometer or digital temperature controller allows hunters to identify unusual temperature increases, refrigeration problems, or airflow issues early. Detecting these problems quickly prevents damage to stored venison and reduces repair costs.
The cooler door and seals also require frequent inspection. Damaged gaskets, loose hinges, or gaps around the door allow warm air to enter and force the refrigeration system to operate longer. Replacing worn seals improves energy efficiency and helps the cooler maintain stable internal conditions.
The refrigeration components should also receive periodic inspection. Hunters should check the condenser area for dust buildup, confirm proper airflow around equipment, and monitor unusual sounds or performance changes. A refrigeration system that works under unnecessary strain may consume more electricity and experience shorter operating life.
Seasonal maintenance is especially important for hunters who use their cooler mainly during deer hunting season. Before the season begins, the entire system should be tested, cleaned, and checked for proper cooling performance. A maintained deer walk-in cooler provides a reliable environment for processing and preserving venison when hunting activity increases.
What Safety Rules Should You Follow When Using a Deer Cooler?
Using a deer walk-in cooler safely requires proper temperature control, sanitation practices, and correct meat handling procedures. The main safety goal of a deer cooler is to prevent contamination and maintain conditions that protect venison quality after harvest. A cooler that has strong refrigeration performance but poor hygiene practices can still create risks for meat quality and food safety.
The first safety rule is maintaining stable cooling conditions. A deer carcass should be placed in a properly operating cooler as soon as practical after harvest and field dressing. Warm meat provides an environment where bacteria can multiply faster, especially when outdoor temperatures are high. Regular temperature monitoring helps hunters identify cooling problems before they affect stored venison.
Cleanliness is another essential part of safe deer cooler operation. Blood, hair, dirt, and processing waste should be removed because these materials can introduce bacteria into the storage environment. Hunters should clean hanging equipment, interior surfaces, and floors after each use to reduce contamination risks and maintain a food-safe processing area.
Proper airflow and carcass spacing are also important safety factors. Deer should not be packed tightly together because restricted airflow slows cooling and creates uneven temperature zones. Leaving enough space between carcasses allows cold air to circulate around the entire surface and helps maintain consistent preservation conditions.
Hunters should avoid several common mistakes when building and operating a deer cooler:
- Using insufficient insulation — Poor insulation allows heat transfer and makes temperature control more difficult.
- Choosing the wrong refrigeration capacity — An undersized cooling system may not remove heat from large or multiple carcasses effectively.
- Ignoring airflow design — Poor circulation can create warmer areas inside the cooler.
- Failing to monitor temperature — Without monitoring, cooling failures may remain unnoticed.
- Neglecting sanitation — Dirty surfaces increase contamination risks during meat processing.
A safe deer walk-in cooler combines proper construction, reliable refrigeration, and consistent maintenance practices. Following these principles allows hunters to preserve harvested deer more effectively and maintain better venison quality from harvest to processing.