
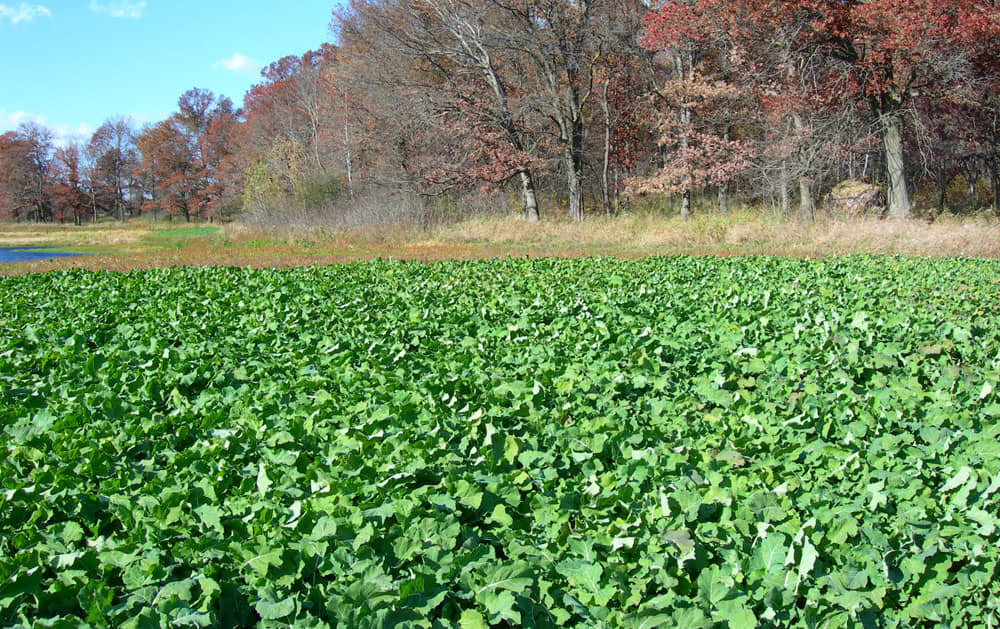
You can plant a productive food plot without a tractor by controlling existing vegetation, selecting seed that performs well with minimal soil disturbance, broadcasting it at the correct rate, and creating firm seed-to-soil contact before rainfall. A tractor, plow, or disc can make large-scale planting faster, but these machines are not required for small hunting plots, remote openings, logging roads, or hard-to-reach sections of a property.
The most reliable tractor-free food plots depend on five factors: adequate sunlight, suitable soil pH, effective weed control, correct seed selection, and dependable moisture after planting. Cereal rye, clover, winter wheat, oats, and selected brassicas are practical choices because they can establish from broadcast seed when the soil surface is properly prepared. Tools such as a backpack sprayer, hand spreader, string trimmer, rake, and lawn roller can complete most of the work.
This guide explains how to choose a location, test and improve the soil, remove competing vegetation, select seed, calculate seeding rates, and improve germination without heavy equipment. It also covers throw-and-mow planting, weed control, browse pressure, food plot costs, and hunting access. The goal is not simply to grow forage, but to create a food plot that attracts deer consistently without adding unnecessary disturbance to the property.
Can You Plant a Successful Food Plot Without a Tractor?
Yes, you can plant a successful food plot without a tractor if you control existing vegetation, establish good seed-to-soil contact, and plant the right forage at the proper time. Heavy equipment makes soil preparation faster, but it is not the factor that determines whether a food plot produces healthy forage or attracts deer. On properties smaller than a few acres, many hunters consistently establish productive food plots using only hand tools and lightweight equipment.
The first requirement is choosing a location that receives enough sunlight. Most food plot species require at least six hours of direct sunlight each day to produce dense, nutritious forage. Woodland openings, abandoned logging roads, utility right-of-ways, old fields, and small clearings often provide enough light while remaining close to bedding cover. Planting in heavily shaded timber usually produces thin, weak growth regardless of how much fertilizer or seed is applied because trees compete aggressively for sunlight, moisture, and soil nutrients.
The second requirement is controlling existing vegetation before planting. Grass, weeds, and thick ground cover compete directly with new seedlings for water, nutrients, and sunlight. Whether you remove vegetation with a backpack sprayer, a string trimmer, repeated mowing, or another low-impact method, reducing competition gives young plants a much higher survival rate. Skipping this step is one of the most common reasons tractor-free food plots fail.
The third requirement is creating adequate seed-to-soil contact. Broadcast seed cannot germinate consistently if it rests on leaves, sticks, or thick thatch instead of mineral soil. After vegetation is removed, lightly rake the surface, expose patches of bare soil, and press the seed into the ground by walking the plot, dragging a homemade roller, or allowing a moderate rainfall to settle the seed naturally. Even small improvements in seed contact can increase germination far more than simply adding extra seed.
The fourth requirement is matching the seed to the planting method. Small-seeded crops such as clover, brassicas, cereal rye, winter wheat, and oats establish more reliably from broadcast planting than crops that require precise planting depth, such as corn or soybeans. These species tolerate minimal soil disturbance and are widely used in no-till and throw-and-mow systems because they germinate well when moisture and soil contact are adequate.
Finally, planting conditions matter more than machinery. A food plot seeded immediately before a steady rainfall, into soil with the correct pH and fertility, will usually outperform a poorly timed plot that was prepared with expensive equipment. Successful hunters focus on soil health, weather conditions, and proper planting techniques rather than relying on tractors alone.
For most hunting properties, a tractor-free food plot is an effective option for establishing attractive forage while reducing cost, minimizing soil disturbance, and accessing remote locations that heavy machinery cannot easily reach.
What Tools Do You Need to Plant a Food Plot Without a Tractor?
You do not need expensive farm equipment to establish a productive food plot. Most small hunting plots can be planted with a handful of affordable hand tools that prepare the site, distribute seed evenly, and improve seed-to-soil contact. The right tools save time and labor, but they do not replace proper planning, soil preparation, or planting timing.
A backpack sprayer is one of the most valuable tools for a tractor-free food plot. It allows you to apply herbicide evenly across existing vegetation before planting, reducing competition from grasses and broadleaf weeds. A sprayer with an adjustable nozzle provides better coverage for both small woodland openings and larger clearings while using less product than spot treatments with handheld bottles.
A hand-crank or chest-mounted broadcast spreader is the simplest way to distribute seed and granular fertilizer. Quality spreaders release material more consistently than throwing seed by hand, reducing bare patches and overcrowded areas. For the best coverage, divide the seed into two equal portions and broadcast one half while walking north to south, then spread the second half while walking east to west. This crisscross pattern improves distribution and minimizes missed areas.
A garden rake is essential for preparing the seedbed. After vegetation has been removed, use the rake to pull away loose debris, break up thick thatch, and expose patches of mineral soil. The goal is not to till the ground deeply but to create enough exposed soil for seed to make direct contact with the surface. In areas covered with leaves or dead grass, a leaf rake can remove lightweight debris much faster than a garden rake and reduce the amount of material that blocks germination.
A string trimmer or brush cutter is useful when preparing areas where mowing equipment cannot reach. Tall weeds, grasses, and light brush should be cut close to the ground before planting. Removing excessive vegetation also makes it easier to rake the surface and spread seed evenly. If saplings or low branches limit sunlight, a pruning saw or chainsaw can open the canopy and improve growing conditions, provided local regulations and safe operating practices are followed.
Several optional tools can make the job easier without changing the overall planting method. A leaf blower quickly clears dry leaves from woodland plots, while a lawn roller, homemade drag, or weighted section of chain-link fence helps press seed into the soil after broadcasting. Hunters who already own an ATV can also use an ATV-mounted sprayer or spreader to cover larger plots more efficiently, although these tools are conveniences rather than necessities.
In addition to planting equipment, every hunter should carry a few basic support items, including a soil-sample bag, measuring tape or rangefinder for estimating plot size, marking flags, work gloves, eye protection, and a notebook or mapping app for recording soil-test results and planting dates. Keeping accurate records makes it easier to adjust fertilizer rates, compare crop performance between seasons, and improve future food plots.
Ultimately, successful tractor-free food plots depend less on the number of tools you own and more on using each tool at the right stage of the planting process. A simple toolkit, combined with careful site preparation and proper timing, is enough to establish high-quality forage that attracts deer throughout the hunting season.
How Do You Choose the Best Location for a Tractor-Free Food Plot?
The best location for a tractor-free food plot combines adequate sunlight, productive soil, reliable moisture, and minimal hunting disturbance. Even the highest-quality seed will struggle if the site receives too little sunlight, holds standing water, or experiences constant pressure from human activity. Selecting the right location before planting often has a greater impact on success than the equipment used to prepare the ground.
The first factor to evaluate is sunlight. Most food plot crops perform best with at least six hours of direct sunlight each day, while eight or more hours generally produce the highest forage yield. Woodland openings, abandoned logging roads, old fields, utility right-of-ways, and recently logged areas often provide enough light without requiring large-scale clearing. Dense hardwood canopies and mature pine stands usually block too much sunlight, causing slow growth, thin forage, and poor weed competition. If the site receives only partial sunlight, prioritize shade-tolerant species such as cereal rye or white clover instead of crops with higher light demands.
Next, evaluate soil drainage and moisture retention. A productive food plot needs soil that drains well after heavy rain while retaining enough moisture for seed germination. Areas that remain flooded for several days can suffocate young roots, whereas excessively sandy ridges may dry out before seedlings become established. Look for level ground or gentle slopes where rainfall infiltrates the soil instead of washing seed downhill. If erosion is visible after storms, choose another location or plant along the contour rather than directly up and down the slope.
The existing vegetation also reveals valuable information about site quality. Native grasses, clover, blackberry patches, and healthy herbaceous plants often indicate productive soil capable of supporting food plot crops. In contrast, areas dominated by thick brush, invasive weeds, or dense saplings may require significantly more preparation before planting. Clearing excessive woody vegetation by hand can consume more time than the actual planting process, so selecting a naturally open site often delivers better long-term results.
From a hunting perspective, deer movement is just as important as soil quality. A food plot should be positioned where deer already travel between bedding cover and feeding areas rather than attempting to pull animals across the entire property. Placing the plot near natural travel corridors increases daytime activity while reducing the distance deer must expose themselves before entering the opening. However, avoid locating the plot directly inside bedding areas, as repeated maintenance and hunting pressure can push deer toward neighboring properties.
Access is another factor that many hunters overlook. Because a tractor-free plot requires carrying seed, fertilizer, sprayers, and hand tools into the site, the location should be practical to reach throughout the year. At the same time, access routes should allow you to enter and leave without crossing the primary feeding area. Walking through the middle of the plot before every hunt leaves ground scent and repeatedly alerts deer to human activity. Whenever possible, use existing trails, creek bottoms, terrain changes, or vegetation screens to conceal your approach.
Finally, consider how the food plot fits into your overall hunting strategy. A small destination plot located in the center of a property may attract deer after dark but remain difficult to hunt during daylight. By contrast, a well-positioned kill plot tucked into the edge of thick cover often receives earlier evening movement because deer feel secure entering it before sunset. Matching plot location to prevailing wind direction, stand placement, and quiet access routes creates opportunities to hunt mature bucks without educating them through repeated disturbance.
Choosing the right location is the foundation of every successful tractor-free food plot. When sunlight, soil, drainage, deer movement, and hunting access all align, the remaining planting steps become significantly easier, and the finished plot is more likely to produce consistent forage throughout the season.
How Much Sunlight Does a Food Plot Need?
Most food plot crops need at least 6 hours of direct sunlight each day, while 8 to 10 hours produces the highest forage yield and the healthiest plant growth. Sunlight drives photosynthesis, allowing plants to produce the carbohydrates needed for leaf development, root growth, and recovery from browsing. When a plot receives too little light, plants become thin, elongated, and less nutritious, reducing both forage production and their ability to withstand repeated feeding by deer.
Open fields naturally provide ideal growing conditions, but many hunters establish food plots inside timber where sunlight is more limited. Woodland openings, abandoned logging decks, powerline corridors, and recently harvested timber often receive enough light without requiring extensive clearing. In mature forests, however, the tree canopy can block a significant portion of available sunlight even during summer, making crop selection more important than on open ground.
Some food plot species tolerate partial shade better than others. Cereal rye, white clover, crimson clover, and winter wheat can produce acceptable forage in areas receiving moderate sunlight, making them suitable for woodland plots. By comparison, crops such as corn, soybeans, and many brassicas perform best in full sun because they require greater energy to produce large leaves, stems, and seed heads. Planting high-light crops beneath a closed canopy usually results in poor germination, slow growth, and lower forage quality regardless of fertilizer application.
Before planting, observe how much sunlight reaches the site throughout the day rather than relying on a single midday inspection. A clearing that appears bright at noon may receive only a few hours of direct sunlight because surrounding trees cast long morning and evening shadows. Smartphone sun-tracking applications, aerial imagery, or repeated site visits during different times of the day can help estimate seasonal light exposure more accurately.
If a promising location lacks sufficient sunlight, selective tree removal can often improve growing conditions. Removing smaller trees along the southern edge of a woodland opening usually increases daily sunlight more effectively than clearing trees on the northern side because the sun remains predominantly in the southern sky across most of North America. Creating wider openings also improves air circulation, allowing vegetation to dry more quickly after rain and reducing disease pressure in dense forage stands.
How Large Should a Food Plot Be for Deer Hunting?
The ideal food plot size depends on the property’s hunting objective, local deer density, and available acreage rather than following a single recommended measurement. A plot designed to intercept deer during daylight differs from one intended to provide large quantities of seasonal nutrition. Understanding this distinction helps hunters build plots that remain productive throughout the season instead of becoming overbrowsed within weeks of germination.
Small food plots, commonly called kill plots, usually range from one-tenth to one acre. These plots are positioned close to bedding cover or along established travel routes where deer naturally move before dark. Because they prioritize hunting opportunities over maximum forage production, kill plots benefit from highly attractive crops and careful stand placement. Their limited size makes them practical to establish without a tractor, but they can experience heavy browsing if deer numbers are high.
Medium-sized food plots generally provide a better balance between forage production and hunting value. With more available forage, deer spend longer feeding, and plants recover more effectively after repeated browsing. Hunters managing private properties often combine one larger feeding plot with several smaller kill plots to distribute deer movement across the property instead of concentrating activity in a single location.
Large destination plots become increasingly difficult to establish without mechanized equipment because they require significantly more seed, fertilizer, weed control, and labor. Although they can attract deer from neighboring properties, they also require greater maintenance and higher annual costs. For hunters relying entirely on hand tools, investing the same effort into several strategically located smaller plots often produces better hunting results than attempting to maintain one oversized field.
Browse pressure should always influence plot size. On properties with high deer densities, a quarter-acre planting may be consumed almost immediately after germination, preventing crops from reaching full maturity. In these situations, increasing planted acreage, using browse-tolerant species such as cereal rye and clover, or dividing forage across multiple locations helps maintain food availability throughout the season.
Ultimately, the best tractor-free food plot is one that matches both the land and the hunting strategy. A well-positioned half-acre plot receiving full sunlight, healthy soil, and moderate deer pressure will consistently outperform a poorly located multi-acre planting that suffers from shade, excessive browsing, or constant human disturbance.
Should You Test the Soil Before Planting a Food Plot?
Yes. A soil test is the single most valuable investment you can make before planting a food plot. It identifies the nutrient levels and soil conditions that determine whether forage will establish quickly or struggle throughout the growing season. Without a soil test, fertilizer and lime applications become educated guesses that often increase costs without improving plant performance.
A standard soil test measures several important properties, including soil pH, phosphorus (P), potassium (K), calcium, magnesium, and organic matter. Many laboratories also provide fertilizer recommendations based on the crop you intend to plant. These results allow you to apply nutrients only where they are needed instead of spreading a general-purpose fertilizer that may contain excessive or insufficient amounts of specific nutrients.
Among all soil properties, soil pH has the greatest influence on nutrient availability. Most food plot species perform best when the pH falls between 6.0 and 7.0. When soil becomes too acidic, plant roots cannot efficiently absorb nutrients even if fertilizer has been applied. In many hunting properties, especially timber soils, low pH limits forage production far more than a lack of fertilizer.
Different crops have slightly different pH preferences, but most commonly planted food plot species fall within a similar range.
| Crop | Preferred Soil pH |
|---|---|
| Cereal Rye | 5.8–7.0 |
| Winter Wheat | 6.0–7.0 |
| Oats | 6.0–7.0 |
| White Clover | 6.2–7.0 |
| Brassicas | 6.0–7.0 |
Collecting a representative soil sample is straightforward. Divide the food plot into areas with similar soil characteristics, remove surface debris, and collect multiple soil cores from the top 4 to 6 inches. Mix these samples thoroughly in a clean bucket before filling the sample bag provided by the testing laboratory. Combining multiple sampling points produces a more accurate picture of the entire plot than relying on a single location.
Testing should ideally be completed several weeks before planting because correcting soil pH takes time. If lime is recommended, applying it well in advance allows the soil to begin adjusting before seeds are planted. Even if planting cannot be delayed, obtaining soil-test results still provides valuable guidance for future seasons and prevents repeated nutrient deficiencies year after year.
Skipping the soil test often leads to three common mistakes: applying unnecessary fertilizer, failing to correct acidic soil, and selecting crops that are poorly suited to existing soil conditions. Spending a small amount on soil analysis typically delivers a greater return than purchasing additional seed or fertilizer without knowing what the soil actually requires.
How Do You Apply Lime Without a Tractor?
You can apply lime effectively without a tractor by using pelletized lime or bagged agricultural lime with a hand spreader. Although spreading lime manually requires more labor than using tractor-mounted equipment, it remains practical for food plots under one acre and provides the same long-term benefit when applied evenly.
Before purchasing lime, calculate how much material the soil test recommends. Most laboratories provide the application rate in pounds per acre or tons per acre. Convert this recommendation to the actual size of your plot so you purchase only the amount required. For example, a quarter-acre food plot requiring two tons of lime per acre needs approximately one-half ton of lime.
Pelletized lime is usually the easiest option for hunters working without machinery. Its uniform pellets flow smoothly through hand spreaders, generate less dust during application, and are easier to transport into remote locations. Traditional agricultural lime generally costs less per treated acre but is much heavier, dustier, and more difficult to distribute evenly by hand.
For the most uniform coverage, divide the lime into two equal portions. Spread the first half while walking in one direction across the plot, then apply the remaining half while walking at a right angle to the first pass. This cross-pattern minimizes streaking and helps ensure that every section of the plot receives a similar amount of material.
Because lime changes soil chemistry gradually, it should be applied as early as possible before planting. If time is limited, applying lime immediately before planting is still better than skipping the application altogether, but the full pH adjustment may not occur until later in the growing season.
How Do You Clear a Food Plot Without Heavy Equipment?
Successful vegetation control is the foundation of every tractor-free food plot. Existing grasses, weeds, and brush compete directly with new seedlings for sunlight, moisture, and nutrients. Unless this competition is reduced before planting, even high-quality seed can fail to establish.
The most common approach is applying a non-selective herbicide with a backpack sprayer several weeks before planting. This method eliminates most existing vegetation while leaving the root structure in place, helping reduce soil erosion and preserve soil moisture. Once the vegetation has completely died, rake away loose material and expose enough mineral soil for seed to contact the surface.
Hunters who prefer to avoid herbicides can prepare a plot through repeated cutting. A string trimmer, brush cutter, or scythe removes standing vegetation, while a garden rake clears thick thatch and exposes patches of bare soil. Although this approach requires more physical labor and often several mowing cycles, it can produce good results in smaller food plots where mechanical equipment cannot easily operate.
Very small plots may also be prepared using light-exclusion methods. Covering vegetation with heavy black tarps or opaque plastic for several weeks deprives weeds of sunlight and weakens existing growth before planting. This technique works best on compact plots where transporting large tarps is practical, though it requires additional preparation time compared with herbicide-based methods.
Regardless of the method used, avoid disturbing the soil more than necessary. Excessive digging or aggressive tilling exposes dormant weed seeds, increases moisture loss, and raises the risk of erosion on sloped ground. The objective is to remove competition while preserving a stable seedbed that supports rapid germination after planting.
Once vegetation has been controlled and the surface has been cleaned, the plot is ready for final seedbed preparation and broadcasting. At this stage, proper seed-to-soil contact becomes the next critical factor influencing germination and long-term forage establishment.
How Do You Prepare the Soil Without a Plow or Disc?
Preparing the soil without a plow or disc focuses on improving seed-to-soil contact rather than creating a finely tilled seedbed. Unlike conventional farming, most tractor-free food plots rely on minimal soil disturbance to preserve moisture, reduce erosion, and prevent dormant weed seeds from reaching the surface. The objective is to expose enough mineral soil for germination while leaving the soil structure largely intact.
Begin by removing branches, rocks, fallen limbs, and other debris that could interfere with broadcasting seed. Large obstacles create uneven seed distribution and make it difficult to press seed into the soil after planting. Once the area is clear, rake away dead grass, leaves, and thick thatch until patches of mineral soil become visible. You do not need to expose every square inch of the plot, but enough bare soil should be available for broadcast seed to settle directly against the ground.
If the surface has become compacted after years of vehicle traffic or livestock use, lightly scratch the top inch of soil with a garden rake or hand cultivator. This shallow disturbance creates small grooves that help capture seed and rainfall without disrupting the soil profile. Digging deeper than necessary provides little benefit for broadcast planting and often stimulates a new flush of weed growth.
Soil moisture should also influence when final preparation takes place. Working the ground when it is saturated compresses soil particles and reduces pore space, limiting root development after germination. On the other hand, preparing extremely dry soil allows moisture to escape more quickly before rainfall arrives. Slightly moist soil is generally the easiest to rake and provides the best conditions for seed establishment.
On sloping ground, avoid raking directly downhill. Instead, work across the contour of the slope to reduce runoff and help rainfall soak into the soil rather than carrying seed away. Preserving crop residue wherever practical also protects the soil surface from erosion and slows evaporation during hot weather.
A properly prepared no-till seedbed may appear rough compared with a conventionally tilled field, but appearance is not the goal. What matters is creating enough exposed soil for germination while maintaining moisture, protecting soil structure, and minimizing unnecessary disturbance.
How Do You Firm the Seedbed Without a Cultipacker?
Firming the seedbed after broadcasting is one of the most overlooked steps in tractor-free food plot establishment. Pressing seed against the soil removes air pockets, improves moisture uptake, and significantly increases germination rates, especially for small-seeded crops such as clover and brassicas.
The simplest method is to walk the entire plot after broadcasting. Your body weight presses seed into the soil surface without burying it too deeply. Although this approach requires time, it works surprisingly well for quarter-acre and half-acre plots where heavy equipment cannot operate.
A water-filled lawn roller provides more consistent pressure over larger areas and is easy to pull by hand or with an ATV if one is available. Many hunters also build inexpensive homemade drags using a section of chain-link fence, wooden pallets, or a heavy log. Dragging these materials lightly across the plot presses seed into the soil while leaving most small seed close enough to the surface for successful emergence.
Natural rainfall can also improve seed-to-soil contact. Broadcasting immediately before a steady rain allows falling water to settle seed into small soil openings without washing it away. However, relying on rainfall alone is risky if the forecast calls for heavy thunderstorms capable of causing erosion or moving seed off the planting area.
Avoid burying small seed during this process. Clover, brassicas, and similar crops germinate best when left on or very near the soil surface. Excessive dragging, aggressive raking, or deep covering often reduces emergence because seedlings lack enough stored energy to reach sunlight after germination.
What Is the Best Seed for a Food Plot Without Tilling?
The best seed for a tractor-free food plot is one that germinates reliably after surface broadcasting and tolerates minimal soil disturbance. Small-seeded species generally outperform large-seeded crops because they require less planting depth and establish quickly when moisture and seed-to-soil contact are adequate.
Among all food plot crops, cereal rye is widely considered the most forgiving option for no-till planting. It germinates in cool temperatures, grows in a wide range of soil types, tolerates moderate soil acidity, and establishes even when seed coverage is less than perfect. These characteristics make it an excellent choice for first-time food plotters and remote hunting properties.
White clover and crimson clover are also excellent options, particularly for hunters seeking multi-season forage. Their small seeds spread easily with hand broadcasters and require very little soil coverage. Once established, clover provides repeated grazing opportunities and improves soil fertility by fixing atmospheric nitrogen through its root nodules.
Winter wheat and oats offer rapid fall growth and produce highly attractive forage during early hunting season. They establish well through broadcast planting when seed is pressed into the soil before rainfall. Brassicas, including turnips and forage radishes, also perform well in no-till systems but require fertile soil and adequate moisture to achieve their full yield potential.
Some crops are considerably less suited to tractor-free planting. Corn, soybeans, grain sorghum, and field peas require more consistent planting depth and stronger seedbed preparation to achieve uniform emergence. While these crops can sometimes be broadcast successfully under ideal conditions, their establishment rates are generally lower without specialized planting equipment.
Many experienced hunters improve reliability by planting seed blends rather than a single species. Combining cereal rye with clover or mixing oats, wheat, and brassicas spreads risk across different growing conditions. If one crop performs poorly because of weather or soil conditions, the remaining species often continue producing forage, extending attraction throughout the hunting season.
Should You Plant an Annual or Perennial Food Plot?
The choice between annual and perennial food plots depends on your management goals, available maintenance time, and long-term hunting strategy. Neither option is universally better, but each offers distinct advantages under different property conditions.
Annual food plots complete their life cycle within one growing season and must be replanted each year. Crops such as cereal rye, oats, winter wheat, and brassicas establish quickly, produce abundant forage, and allow hunters to adjust planting mixes annually based on changing deer activity or habitat objectives. Annuals are also useful when correcting soil conditions because each new planting provides an opportunity to modify fertilizer programs and crop selection.
Perennial food plots remain productive for several years when managed properly. White clover is one of the most common perennial species because it tolerates repeated browsing, produces high-protein forage, and reduces fertilizer requirements through biological nitrogen fixation. Once established, perennial plots generally require less annual planting effort, although periodic mowing, weed control, and soil amendments remain necessary.
| Factor | Annual Food Plot | Perennial Food Plot |
|---|---|---|
| Planting frequency | Every year | Every 3–5 years (with maintenance) |
| Establishment speed | Fast | Slower |
| Seasonal flexibility | High | Moderate |
| Long-term maintenance | Lower during season, higher annually | Lower planting frequency, ongoing maintenance |
| Typical species | Rye, oats, wheat, brassicas | White clover, alfalfa (where suitable) |
For hunters creating a food plot without a tractor for the first time, annual crops often provide the highest chance of success because they establish rapidly and allow mistakes to be corrected the following season. Once soil fertility and planting techniques have improved, introducing perennial species can reduce long-term maintenance while providing dependable forage year after year.
Many successful hunting properties combine both systems. Annual plots deliver fresh attraction during the fall, while perennial plots provide consistent nutrition through spring and summer. This diversified approach supports healthier deer throughout the year and reduces the risk of forage shortages caused by weather or heavy browsing.
When Should You Plant a Food Plot Without a Tractor?
The best time to plant a tractor-free food plot depends on the forage species, local climate, soil moisture, and the timing of the hunting season. Planting too early can expose young seedlings to drought and excessive heat, while planting too late may prevent crops from establishing before the first frost. Matching planting dates to growing conditions is one of the most effective ways to improve germination without changing equipment or planting methods.
For fall food plots, most hunters should plant approximately 30 to 60 days before the area’s average first frost. This window gives cool-season crops enough time to develop strong root systems while producing tender forage during early and mid-season hunting. Cereal rye, winter wheat, oats, and many brassicas perform best when soil temperatures begin to decline but moisture levels remain relatively high.
Spring planting is more appropriate for perennial species such as white clover or for annual warm-season crops where legal and practical. Soil temperatures should remain consistently above the crop’s minimum germination requirement, and extended periods of freezing weather should have passed. Planting too early into cold soil slows emergence and increases the risk of seed loss from heavy rain or wildlife feeding.
Rather than following a calendar alone, monitor three environmental conditions before planting:
- Soil moisture should be sufficient to support germination.
- Air and soil temperatures should match the selected crop.
- A reliable rainfall event should be expected shortly after planting.
These factors often influence establishment more than the exact planting date. A plot seeded one week later under ideal moisture conditions frequently outperforms one planted earlier into dry soil.
Hunters managing properties across different regions should adjust planting schedules according to local frost dates instead of copying recommendations from another state or province. For example, food plots in the northern Midwest are often planted weeks earlier than those in the Deep South because seasonal cooling occurs much sooner.
Should You Plant a Food Plot Before or After Rain?
Planting immediately before a steady, moderate rainfall usually produces the highest germination rates for broadcast food plots. Rainfall supplies the moisture needed to activate germination while naturally pressing seed into small openings on the soil surface. This is especially important in tractor-free systems where seed is not drilled into the ground.
An ideal forecast generally includes 0.25 to 1 inch (6–25 mm) of gentle rain within the first 24 to 48 hours after planting. This amount usually provides enough moisture for germination without causing significant erosion or washing seed away. Several days of light rain are often more beneficial than one intense thunderstorm delivering the same total rainfall.
Avoid planting immediately before severe storms. Heavy downpours can move seed downhill, fill low areas with sediment, and expose newly planted ground to erosion. Small seeds such as clover and brassicas are particularly vulnerable because they remain close to the soil surface. If severe weather is forecast, delaying planting by a few days generally produces more consistent results.
Planting into dry soil without rain in the forecast is equally risky. Seeds may remain dormant for extended periods, and repeated cycles of heat and drying can reduce germination rates. Although some species tolerate delayed rainfall better than others, most food plot crops establish more uniformly when moisture is available soon after planting.
Checking both the short-term and extended weather forecast before broadcasting seed is one of the simplest ways to improve establishment. A few minutes spent monitoring rainfall predictions can prevent weeks of lost growth and reduce the need for reseeding.
How Do You Plant a Food Plot Without a Tractor Step by Step?
Planting a food plot without a tractor is a straightforward process when each step is completed in the correct order. Every stage builds on the previous one, from preparing the site to protecting newly established seedlings. Skipping a step often has a greater impact on success than the choice of seed or fertilizer.
Step 1: Measure the Plot
Determine the exact size of the planting area using a measuring wheel, GPS application, mapping software, or rangefinder. Accurate measurements allow you to calculate seed, fertilizer, and lime requirements correctly while avoiding unnecessary expense.
Step 2: Collect a Soil Sample
Take multiple soil cores from across the plot, mix them thoroughly, and submit a representative sample to a soil testing laboratory. Review the results before purchasing fertilizer or lime.
Step 3: Apply Lime if Needed
Spread the recommended amount of lime evenly across the plot. If possible, apply lime several weeks before planting to allow time for soil pH to begin adjusting.
Step 4: Eliminate Existing Vegetation
Control grasses and weeds using a backpack sprayer, repeated mowing, or manual clearing. Wait until vegetation has completely died or been cut before beginning seedbed preparation.
Step 5: Prepare the Seedbed
Remove thick thatch, leaves, and loose debris with a rake. Expose enough mineral soil to ensure good seed-to-soil contact while avoiding excessive soil disturbance.
Step 6: Apply Fertilizer
Spread fertilizer according to the soil-test recommendation rather than using a generic blend. Uniform application encourages even crop growth and prevents nutrient deficiencies.
Step 7: Calibrate the Broadcast Spreader
Adjust the spreader according to the manufacturer’s recommendations and the selected crop. Calibration ensures that seed is distributed at the intended application rate across the entire plot.
Step 8: Broadcast the Seed
Divide the seed into two equal portions. Spread the first half while walking in one direction, then spread the second half perpendicular to the first pass. This cross-pattern improves coverage and reduces missed strips.
Step 9: Improve Seed-to-Soil Contact
Walk across the plot, pull a lightweight drag, use a lawn roller, or allow moderate rainfall to settle the seed naturally. Avoid burying small seed beneath more than a thin layer of soil.
Step 10: Allow Rainfall to Complete the Process
Ideally, planting should be completed shortly before a dependable rainfall event. Moisture activates germination and helps maintain consistent soil contact during the first few days after seeding.
Step 11: Minimize Disturbance
Avoid driving vehicles, walking through the plot unnecessarily, or allowing livestock access while seedlings become established. Young plants are especially vulnerable during the first few weeks of growth.
Step 12: Monitor Germination
Inspect the plot regularly to evaluate germination, identify weed pressure, and assess browse activity. If large bare areas appear, determine whether the problem resulted from poor seed-to-soil contact, inadequate moisture, excessive browsing, or incorrect seeding rates before deciding to reseed.
Following these steps creates a repeatable planting system that works across most small hunting properties. Once the process has been refined for your soil, climate, and preferred forage species, future food plots become easier to establish while requiring fewer corrections throughout the growing season.
How Deep Should Food Plot Seed Be Planted?
Correct planting depth is critical because seeds contain only enough stored energy to reach the soil surface once. If seed is planted too shallow, it can dry out before germination or become food for birds and small mammals. If it is planted too deep, the emerging shoot may never reach sunlight, resulting in poor stand establishment even when soil fertility and moisture are ideal.
In tractor-free food plots, planting depth depends primarily on seed size. Small seeds require very little soil coverage because they have limited energy reserves, while larger seeds need greater depth to maintain moisture and anchor developing roots.
| Crop | Recommended Planting Depth |
|---|---|
| White Clover | Surface to ¼ inch (0–6 mm) |
| Crimson Clover | ¼ inch (6 mm) |
| Brassicas | ¼–½ inch (6–13 mm) |
| Cereal Rye | ½–1 inch (13–25 mm) |
| Winter Wheat | 1–1½ inches (25–38 mm) |
| Oats | 1–1½ inches (25–38 mm) |
Broadcast planting naturally creates slight variation in seed depth, which is acceptable for most no-till food plots. The goal is not perfect placement but maximizing the number of seeds that maintain consistent contact with moist soil. Walking the plot or using a light roller after broadcasting usually provides sufficient coverage without burying seed too deeply.
Many first-time food plotters make the mistake of aggressively raking after broadcasting. While this may seem like a good way to cover seed, it often buries small species such as clover and brassicas well below their optimum depth. These seedlings frequently germinate underground but fail to emerge because they exhaust their stored energy before reaching the surface.
As a general rule, when planting without specialized equipment, it is safer to leave small seed slightly too shallow than too deep. Adequate moisture and good seed-to-soil contact usually compensate for minimal coverage, whereas excessive depth significantly reduces emergence.
Read more: The Best No-Till Drill For Food Plots: Attract and Help Deer Grow Now!
How Does the Throw-and-Mow Method Work?
Throw-and-mow is a no-till planting technique that establishes food plots by broadcasting seed into standing vegetation before cutting the vegetation to form a protective mulch layer. Instead of turning the soil with a plow or disc, the existing plant residue suppresses weeds, conserves moisture, and shields young seedlings during establishment.
The method follows four basic steps:
- Allow existing vegetation to grow until it produces enough biomass to form mulch.
- Broadcast seed evenly across the standing vegetation.
- Cut or roll the vegetation so it falls over the newly distributed seed.
- Allow rainfall to settle the seed through the mulch and into contact with the soil.
The mulch layer provides several important benefits. It reduces direct sunlight on the soil surface, slowing moisture loss during hot weather. It also cushions the impact of heavy rainfall, reducing erosion and preventing seed from washing away. As the vegetation decomposes, it gradually contributes organic matter that improves soil structure and supports microbial activity.
Throw-and-mow works particularly well with cereal rye, clovers, brassicas, winter wheat, and oats because these species germinate successfully with limited soil disturbance. Their small seeds can settle naturally through the mulch layer as rainfall carries them toward the soil surface.
However, the technique has limitations. Thick, woody vegetation creates too much residue for seed to reach the soil. Extremely dry conditions may prevent seeds from penetrating the mulch, while heavy storms immediately after mowing can displace both mulch and seed. The method also performs poorly when plots contain dense perennial weeds that recover quickly after cutting.
For hunters managing remote properties without tractors, throw-and-mow offers one of the lowest-cost planting systems available. When combined with effective weed control and favorable weather, it can produce forage comparable to conventional tillage while preserving soil health and reducing annual labor.
How Much Seed Should You Use in a Small Food Plot?
Applying the correct seeding rate is just as important as selecting the right crop. Too little seed leaves open ground where weeds quickly establish, while excessive seeding creates overcrowded plants that compete for sunlight, water, and nutrients. Higher seeding rates cannot compensate for poor soil preparation or inadequate rainfall.
Several factors determine how much seed a food plot requires:
- Total plot size
- Crop species
- Seed blend or monoculture
- Germination percentage
- Pure Live Seed (PLS) value
- Broadcast versus drilled planting
Broadcast planting generally requires 10–20% more seed than drilling because some seed remains exposed or lands in locations with poor soil contact. Increasing the seeding rate slightly helps offset these unavoidable losses without creating excessive plant competition.
The table below provides general broadcast recommendations for common cool-season food plot crops.
| Crop | Broadcast Rate | Best Season | Shade Tolerance |
|---|---|---|---|
| Cereal Rye | 100–150 lb/acre | Fall | High |
| Winter Wheat | 90–120 lb/acre | Fall | Moderate |
| Oats | 80–100 lb/acre | Fall / Spring | Moderate |
| White Clover | 6–10 lb/acre | Spring / Fall | High |
| Brassica Blend | 4–8 lb/acre | Late Summer / Fall | Low |
When planting seed mixtures, reduce the rate of each individual component to avoid overcrowding. For example, a rye-and-clover blend uses substantially less rye than a pure rye planting because the clover occupies part of the available growing space.
Always calibrate the spreader before planting. Walking speed, spreader opening, and terrain all influence the amount of seed delivered. Spending a few minutes checking the application rate prevents expensive seed from being wasted and improves stand uniformity across the plot.
How Do You Fertilize a Food Plot Without a Tractor?
Food plots can be fertilized effectively without a tractor by applying nutrients evenly with a hand spreader and following soil-test recommendations. Fertilizer supports vigorous root development, rapid establishment, and higher forage production, but only when the correct nutrients are supplied in the proper amounts.
Begin by using the fertilizer recommendation from your soil test rather than selecting a generic blend. Every site differs in nutrient availability, and applying fertilizer without knowing existing soil conditions often leads to unnecessary expense or poor crop performance.
Measure the total fertilizer required for the plot and divide it into two equal portions. Spread the first half while walking in one direction, then apply the remaining half perpendicular to the first pass. This crisscross application pattern produces more uniform nutrient distribution and reduces streaking caused by inconsistent walking speed.
Understanding the role of each major nutrient also helps explain why balanced fertilization matters:
- Nitrogen (N) promotes leaf growth and rapid forage production.
- Phosphorus (P) supports root development and early seedling establishment.
- Potassium (K) improves drought tolerance, disease resistance, and overall plant vigor.
Legume crops such as white clover require less supplemental nitrogen after they become established because beneficial bacteria associated with their roots convert atmospheric nitrogen into forms the plants can use. Applying excessive nitrogen to mature clover stands often stimulates grass competition rather than improving clover growth.
Whenever possible, apply fertilizer shortly before rainfall. Moisture helps dissolve nutrients and move them into the root zone where plants can absorb them. Avoid spreading fertilizer immediately before intense storms, as runoff can carry nutrients away from the plot and reduce application efficiency.
Consistent fertility management does more than increase forage production. Healthy, well-fed plants recover more quickly from browsing, compete more effectively with weeds, and remain attractive to deer for a longer portion of the hunting season. Combined with proper soil pH and good planting practices, balanced fertilization creates the foundation for a productive tractor-free food plot year after year.
How Do You Control Weeds in a No-Till Food Plot?
Effective weed control begins before the first seed is planted. Once weeds become established, they compete directly with food plot crops for sunlight, soil moisture, nutrients, and growing space. In a no-till system, where the soil is disturbed as little as possible, preventing weed pressure is significantly easier than eliminating it after germination.
The first line of defense is eliminating existing vegetation before planting. Whether you use a non-selective herbicide, repeated mowing, or another vegetation control method, the objective is to reduce competition so newly germinated seedlings receive maximum access to sunlight and soil resources. Planting directly into actively growing weeds almost always results in uneven establishment and lower forage production.
After planting, rapid crop establishment becomes the best natural weed control strategy. Dense stands of cereal rye, winter wheat, oats, and healthy clover quickly shade the soil surface, reducing the amount of sunlight available for weed germination. The faster desirable forage occupies the available space, the fewer opportunities invasive weeds have to spread.
Regular monitoring allows problems to be corrected before they become severe. Walk the plot every few weeks during the establishment period and identify weed species while they are still small. Spot treatment is far easier than attempting to reclaim a heavily infested plot later in the season. Early detection also helps distinguish normal annual weeds from aggressive perennial species that require different management strategies.
For perennial food plots such as clover, timely mowing can suppress many annual weeds before they produce seed. Cutting weeds slightly above the clover canopy reduces weed competition while allowing the clover to continue growing. Mowing should never remove excessive clover growth because doing so weakens the forage stand and creates additional open space for weeds to invade.
Selective herbicides may also be appropriate for established food plots, provided the product is specifically labeled for both the forage species being grown and the target weed. Always follow the product label regarding application timing, rates, weather conditions, and crop safety. Applying an incompatible herbicide can severely damage or completely destroy the food plot.
Crop rotation provides another effective long-term strategy. Planting the same annual crop in the same location year after year encourages weed species that are adapted to those growing conditions. Rotating between cereal grains, brassicas, legumes, and other compatible forage species interrupts weed life cycles while improving overall soil health.
Ultimately, the healthiest food plots experience the fewest weed problems. Proper soil fertility, balanced pH, vigorous forage growth, and good planting practices naturally reduce weed competition and minimize the need for repeated chemical control.
How Do You Protect a Small Food Plot From Overbrowsing?
Overbrowsing occurs when deer consume new growth faster than the plants can replace it. This problem is especially common in small food plots located in areas with high deer densities. Even a perfectly planted plot can fail if young forage is grazed continuously before establishing a strong root system.
One of the most effective solutions is increasing the total amount of available forage. Expanding an existing plot or planting several smaller plots across the property spreads browsing pressure over a larger area. When deer have multiple feeding locations, no single plot experiences constant grazing.
Selecting browse-tolerant crops also improves long-term productivity. White clover, cereal rye, and winter wheat generally recover more quickly from repeated feeding than crops that rely on a single growing point. Blending multiple forage species further reduces risk because deer rarely consume every plant at the same rate throughout the season.
Temporary exclusion cages provide an excellent way to evaluate browsing pressure. These small fenced areas prevent deer from feeding inside a limited section of the plot. Comparing vegetation inside the cage with surrounding forage reveals whether poor plant growth results from soil conditions or excessive deer browsing. If plants inside the cage are significantly taller, browse pressure—not fertility—is likely limiting production.
Property management also influences browse intensity. Improving natural habitat through timber stand improvement, prescribed burning where appropriate, or native vegetation management increases alternative food sources throughout the property. When deer have access to diverse forage beyond the food plot, browsing pressure becomes more evenly distributed.
Where deer populations exceed the property’s carrying capacity, habitat improvements alone may not solve the problem. In regions where regulations allow, adjusting harvest strategies to better match local deer density can improve both habitat quality and long-term food plot performance.
What Are the Most Common Mistakes When Planting Without a Tractor?
Most tractor-free food plot failures result from management errors rather than the absence of heavy equipment. Identifying these common mistakes allows hunters to avoid expensive replanting and achieve more consistent forage production.
Skipping the soil test is perhaps the most common error. Without knowing soil pH and nutrient levels, fertilizer and lime applications become guesswork, often producing disappointing results.
Choosing a shaded location limits plant growth regardless of seed quality. Many hunters underestimate how much sunlight mature food plot species require, especially within dense timber.
Planting the wrong crop is another frequent mistake. Corn and soybeans generally require more intensive seedbed preparation than broadcast no-till systems can provide, while cereal rye and clover establish much more reliably with hand tools.
Broadcasting seed onto thick thatch prevents consistent seed-to-soil contact. Even high germination seed cannot establish when it rests on dry leaves or dead vegetation instead of moist soil.
Planting seed too deeply significantly reduces emergence, particularly for small-seeded crops such as clover and brassicas. Heavy raking after broadcasting often causes more harm than good.
Using incorrect seeding rates creates additional problems. Too little seed encourages weed invasion, while excessive rates increase competition among young plants and reduce overall stand quality.
Ignoring weather forecasts often leads to poor germination. Broadcasting immediately before prolonged dry weather or severe storms greatly increases the risk of establishment failure.
Applying fertilizer without correcting soil pH limits nutrient availability. Even properly fertilized crops struggle when acidic soils prevent roots from absorbing essential nutrients efficiently.
Neglecting weed management allows invasive species to dominate young food plots before desirable forage becomes established.
Finally, building a plot that is too small for the local deer population often results in complete overbrowsing. Successful food plot design always considers expected grazing pressure alongside planting techniques.
Avoiding these mistakes dramatically improves the success rate of tractor-free food plots while reducing annual maintenance costs.
How Long Does a Tractor-Free Food Plot Take to Grow?
Most tractor-free food plots begin germinating within one to three weeks, but the exact timeline depends on crop species, soil temperature, moisture, and weather conditions. Germination is only the first stage of establishment. A plot becomes truly productive after plants develop strong root systems and produce enough forage to withstand repeated browsing.
Under favorable conditions, cereal rye often germinates within 5 to 10 days, making it one of the fastest-establishing food plot species. Oats and winter wheat usually emerge within one to two weeks, while clover may require slightly longer depending on soil temperature and moisture availability. Brassicas generally establish quickly in warm, moist soil but develop their highest forage value several weeks after emergence.
Environmental conditions have a greater influence on growth than planting method. Consistent soil moisture, moderate temperatures, and adequate fertility encourage rapid establishment, while drought, nutrient deficiencies, or prolonged cold weather slow development regardless of seed quality.
Hunters should evaluate food plot development in four stages:
- Germination – Seed absorbs moisture and seedlings emerge.
- Establishment – Roots expand and plants begin steady growth.
- Forage Production – Sufficient leaf mass develops to attract consistent deer activity.
- Peak Attraction – The plot reaches maximum nutritional value and hunting effectiveness during the target season.
Avoid judging success too early. A plot that appears thin after the first week may fill in significantly over the following month as additional seeds germinate and root systems expand. Conversely, rapid early growth does not guarantee long-term success if drought, weed competition, or excessive browsing develops later in the season.
Regular monitoring throughout the growing season allows hunters to identify emerging problems while corrective action is still possible. Observing plant color, stand density, browse intensity, and weed pressure provides valuable information that can improve both the current planting and future food plots.
How Much Does It Cost to Plant a Food Plot Without a Tractor?
A tractor-free food plot is considerably less expensive than a conventionally tilled plot because it eliminates the cost of purchasing, maintaining, or renting heavy equipment. Most first-time expenses involve hand tools that can be reused for many seasons, while annual costs are primarily seed, fertilizer, lime, and weed control.
The actual budget depends on plot size, soil condition, crop selection, and whether you already own basic equipment. Properties requiring large amounts of lime or extensive vegetation control generally cost more during the first year than established food plots that only need routine maintenance.
The table below provides a realistic cost estimate for a typical cool-season food plot.
| Expense | ¼ Acre | ½ Acre | 1 Acre |
|---|---|---|---|
| Soil Test | $20–30 | $20–30 | $20–30 |
| Seed | $25–45 | $45–80 | $80–150 |
| Lime | $20–40 | $40–80 | $80–150 |
| Fertilizer | $20–40 | $40–70 | $70–140 |
| Herbicide | $15–30 | $20–40 | $30–60 |
| Annual Operating Cost | $100–185 | $165–300 | $280–530 |
If you are starting from scratch, you should also budget for reusable equipment.
| Equipment | Typical Cost |
|---|---|
| Backpack Sprayer | $40–100 |
| Hand Broadcast Spreader | $25–60 |
| Garden Rake | $20–40 |
| Leaf Rake | $15–30 |
| String Trimmer (if needed) | $100–300 |
| Work Gloves & Safety Glasses | $20–40 |
Although these purchases increase first-year costs, they can be used for many planting seasons, reducing future expenses considerably.
Hunters often assume that owning a tractor is necessary to establish quality forage, but the opposite is frequently true on smaller properties. A well-managed half-acre food plot created with hand tools often produces better hunting results than a poorly maintained multi-acre field planted with expensive machinery. Investing in soil improvement, quality seed, and proper timing usually delivers a greater return than investing in equipment alone.
How Do You Hunt Over a Small Food Plot Without Ruining It?
A productive food plot attracts deer only if hunting pressure remains low. Frequent human activity, poor stand placement, and careless access routes can quickly educate mature deer, causing them to visit the plot only after dark. Protecting the food plot from unnecessary disturbance is therefore just as important as establishing healthy forage.
Stand placement should always account for the prevailing wind direction. Position the stand or blind downwind of the most likely deer approach so your scent is carried away from incoming animals. Hunting with an unfavorable wind may provide a short-term opportunity, but repeated mistakes often reduce daylight activity for the remainder of the season.
Access routes deserve equal attention. Enter and leave the hunting area without crossing the food plot whenever possible. Creek bottoms, logging roads, terrain depressions, or natural vegetation screens allow hunters to approach quietly while minimizing scent contamination. Walking directly across the plot before every hunt leaves both ground scent and visual disturbance that cautious deer quickly associate with danger.
Small food plots generally perform best when hunted selectively rather than aggressively. Instead of sitting over the same location every evening, wait for favorable weather conditions, appropriate wind direction, or seasonal movement patterns. Limiting hunting pressure helps mature bucks continue using the plot during legal shooting hours instead of shifting activity to nighttime.
Trail cameras provide valuable information without requiring daily visits. Position cameras along entry trails or at the edge of the plot rather than directly over the primary feeding area. Using longer intervals between camera checks further reduces disturbance while still revealing movement patterns and identifying the best times to hunt.
The surrounding habitat also influences hunting success. Maintaining thick bedding cover near the plot encourages earlier deer movement, while screening vegetation around plot edges helps deer feel secure entering the opening before sunset. Creating a gradual transition between dense cover and the food plot often increases daylight use compared with abrupt openings surrounded by mature timber.
A food plot should function as part of a complete hunting strategy rather than as an isolated destination. When stand location, access routes, wind direction, and habitat improvements work together, the plot becomes a reliable location for observing and harvesting mature deer throughout the hunting season.
Is a Tractor-Free Food Plot Worth Planting?
Yes. A tractor-free food plot is worth planting if the site receives adequate sunlight, the soil is properly managed, existing vegetation is controlled, and the selected forage matches local growing conditions. Heavy equipment can improve efficiency on large properties, but it is not a requirement for producing high-quality forage or creating consistent hunting opportunities.
Successful tractor-free food plots are built on five fundamental principles:
- Choose a location with sufficient sunlight and reliable drainage.
- Correct soil pH and fertility using a soil test.
- Eliminate vegetation that competes with new seedlings.
- Select forage species that establish well through broadcast planting.
- Maximize seed-to-soil contact and plant before dependable rainfall.
When these principles are followed consistently, small food plots established with hand tools often rival conventionally planted fields in forage quality and deer attraction. They also offer several practical advantages, including lower startup costs, easier access to remote locations, reduced soil disturbance, and greater flexibility for hunters managing small properties.
Perhaps the greatest advantage is accessibility. Hunters who do not own tractors, ATVs, or specialized farm implements can still create productive feeding areas using simple equipment and sound land-management practices. This makes food plotting possible on leased ground, family hunting properties, woodland clearings, and isolated openings where heavy machinery cannot operate efficiently.
Ultimately, the success of a food plot depends far more on planning than on horsepower. Understanding soil conditions, selecting appropriate forage, monitoring weather, and minimizing hunting pressure consistently produce better results than relying on machinery alone. For many hunters, a carefully managed tractor-free food plot is one of the most cost-effective improvements they can make to increase both deer nutrition and hunting success.