Having a action camera like a GoPro is something that more and more hunters are using to capture and remember their hunts forever. Let’s go over how to use one and what some of the possibilities are.
Table of Contents
New Or Used
Consider a Used GoPro
If you don’t currently own a GoPro and you want to try filming your next hunt, consider checking out if there are any used options available. Buying a new GoPro can be really expensive, especially considering all of the accessories and mounts that will allow you to make the most of the experience. If you’re in Utah, Idaho, or Wyoming, KSL Classifieds is a great place to start looking. Otherwise, try Craigslist or whatever local classifieds you prefer!

Buying a New GoPro
If you don’t mind paying a little more, the Hero7 Black is the newest and best one out today. It’s got some pretty amazing capabilities: HyperSmooth Video, voice control, live streaming, GPS, and incredible quality from 4k video at 60 FPS, or 2.7K at 120 FPS. It has everything you’ll need and then some – making it awesome for hunting.

Whether you go new or used, you now have a hunting camera and are ready to start capturing your hunts and make sure they’ll always be remembered! First, let’s go over the setup before you head for the hills and make sure everything is ready to go!
Setting It Up
A vital part of using a GoPro with little effort during your hunt is to make sure that it’s set up properly in advance. There are a few default features we’ll want to change considering our use of the camera.
Custom GoPro Settings
- One button record – This is a great setting for hunters, as it will allow you to start recording with the push of a button (this is automatic in the new cameras) and have confidence you’re going to capture the shot. A lot can happen in the moments leading up what you want to film, and you shouldn’t have to worry about getting the camera running.
- Turn off all beeping & noise – Leaving this on could leave you devastated. Imagine hitting the record button right before you go to take a shot and the camera beep spooks your animal. Horrible. How to change these settings on page 67-68 on the Hero7 Black user manual.
- Disable the LED’s – Speaking of giving away your position, the blinking light on the front of the camera is like a beacon to deer and elk that there’s a person here and they’ll probably stay away. No further explanation needed. You can find these settings in the same place as you change the beeping.
- Film at least 1080p – The higher the video quality you capture, the better your video looks. The biggest downside to higher quality is that you’ll need bigger SD cards, but these aren’t that expensive anymore and it’s totally worth it when you see the difference.
- High frame rates – I’d recommend going with the highest frame rate you can (60-120 is best). In the older cameras, this gives you more frames to work with if you plan on editing your video, and you can remove some of the shaky frames. Plus, if you’re bowhunting, a higher frame rate allows you to see the arrow flying through the air and gives you the option for slow motion.
- Enable smartphone app – GoPro has a smartphone app you can download that enables you to control the camera from your phone. The newer ones even let you see a live feed on your device. This is a necessity if you want to use your camera at a baited location or if you are really ambitious and have set up two or more cameras around you.
- Update the GoPro – this shouldn’t be too difficult, but it’s important to do as it will make sure that everything with the setup works properly. It’s really quick, and it never hurts to check while you’ve got WiFi.
- Consider two cameras – If you want to make really professional and awesome videos, it may be worth investing in two or more cameras. Here’s a scenario: you’re in a treestand, camera mounted to your bow. You have a feeder setup below and another camera capturing that too. A beautiful buck makes his way up to the feeder and starts eating. You take your shot and down the deer. You now have two different angles of your perfect shot, and now have the ability to incredible bragging rights and an awesome video. Alternatively, if you make a bad shot, there’s a chance you can see where the deer was hit and give you more of an advantage to find him.
Now that we’ve gone over the settings, what about the accessories?
>> The Easiest Way on How to Make a Deer Feeder
>> How to Find Deer In the Woods: The 5 Effective Steps to Follow
GoPro Mounts & Accessories
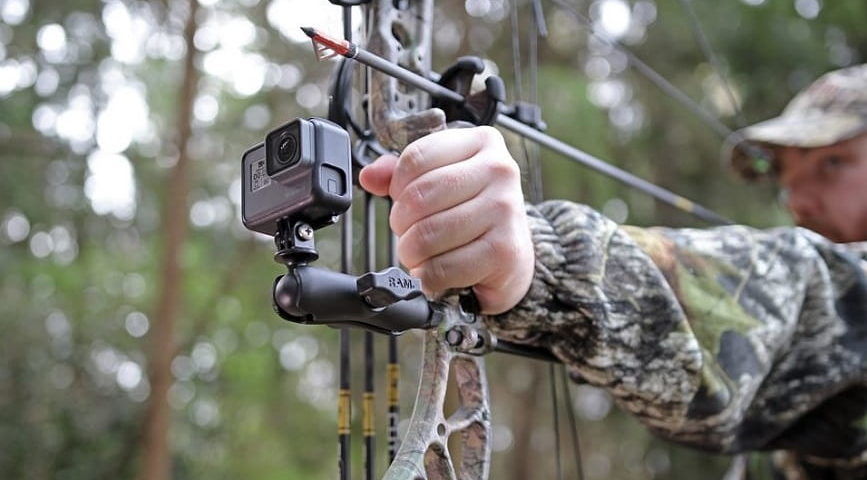
There are some essentials that you’ll want to make the most of filming a hunt. Something like the Handlebar / Seatpost / Pole Mount is a really versatile option and should fit your stabilizer or barrel.
There are a ton of other mounts to check out, and if you get creative you can make almost anything work. These guys even used one of the pole mounts and attached it to a stick. You could even use something like the jaws mount to attach it to your backpack or ATV.
>> The 4 Best GoPro Bow Mounts For Seamless Footage While Hunting!
>> 5 Helpful Wildgame Innovations Trail Camera Troubleshooting to Follow
There is a pretty cool company called Phone Skope that built a GoPro attachment for spotting scopes too. Now you can use that high-quality video capability to capture pretty much anything!
Lastly, if you want to capture audio like elk bugles or turkey gobbles, consider using the skeleton backdoor instead of the totally sealed waterproof backdoor. Newer GoPro’s won’t have issues with rain, and having an opening to the camera allows for the audio to sound much, much better.
Now that we’ve been over the setup and accessories, let’s film!
Start Filming
At this point, your camera is set up. You’ve got the accessories you need and you have some idea of what you can do with it. Let’s go over some of the ways we can put this camera to use and show off your hunts for years to come.
Using The Camera
As I mentioned earlier, I recommend filming your videos with at least 1080p and 60 FPS. This is the minimum to get really good quality video and some flexibility to zoom in or slow it down. Mess around with the settings and see what you like best. The most obvious applications for this camera is to mount to your chest, head, backpack, or weapon. These are all mounting spots that should get great viewpoints and capture the hunt.
Try getting creative with how you’re filming too. We’ve already talked about placing multiple cameras & mounting to sticks, but you could potentially use a GoPro as a trail cam (although I recommend an actual trail cam), use the Karma Drone for aerial views (if legal), or do a time lapse to show how long you sat in your treestand patiently waiting. Maybe you want to mount your GoPro to the ATV or side-by-side to show you digging in the mud or maneuvering some crazy trails. No matter what you do, having a camera like the GoPro enables a ton of possibilities to make great videos and remember your hunts in a brand new way.

Challenges Hunting With a GoPro
One of the challenges with filming your hunts is distance. Even if you’re getting really close, most of the time it seems a lot further away when you watch the video. The massive bull elk that you were 40 yards away from might not do justice on camera, even with incredible quality (although better quality does help). The best solutions I’ve come up with is trying to get closer, zooming on the footage after the fact (again, better quality helps), or using a second camera at the feeding area to capture another angle. The upside is you can still get amazing footage and capture memories like never before. Just try to not to be too disappointed when you mount a camera to your long range rifle and can’t see anything in the film.
Conclusion
I’d love to see the footage you make and have already made on your hunts. Send your videos to [email protected] and I’ll share and follow you on social!
Heres a quick overview of how to film your next hunt with a GoPro:
- Get a camera – new or used
- Customize the settings so it doesn’t beep or flash
- Find the right accessories for your needs
- Mount to your barrel or bow
- Get close and start filming!